
A Guide to Creating GIFs and Adding them to Emails

Gifs have become very popular in marketing as a way to grab a viewer’s attention. GIFs (Graphics Interchange Format) display a rapid series of images which produces the illusion of motion. Using a GIF allows you to highlight an offer or a new product, show a product in action, provide a preview, and tell a story in a more visually engaging way. It makes sense then to extend their use in email marketing campaigns. Here’s a brief guide to creating a basic GIF and how to insert them in an email. Which turned out to be a lot easier than I was expecting!
How to create a GIF
I have used Adobe Photoshop in the following example. If you do not have this software there are online makers you can use for your creation. The best known of these is Giphy, who also have a range of ready to go GIF’s, if you want to skip the creating step altogether.
To begin my animation I imported a series of images I had already created into Adobe Photoshop.These were each put on their own layer by the programme. These will become the individual frames in our animation. I give each layer a name so it is easier to keep track of the images. Just double click on a layer name to type in a new one

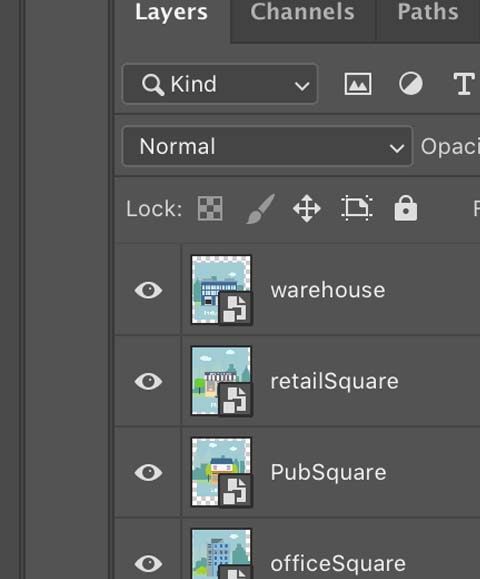
You want to keep your file size down when creating so that load times in your email are not affected too much. Each frame you add adds to the overall size. This example is just 5 frames long and when completed is less than 1mb in size. Ideally keep to under 2.5MB. You also want to keep your design clean and simple. A GIF can only contain 256 colors.
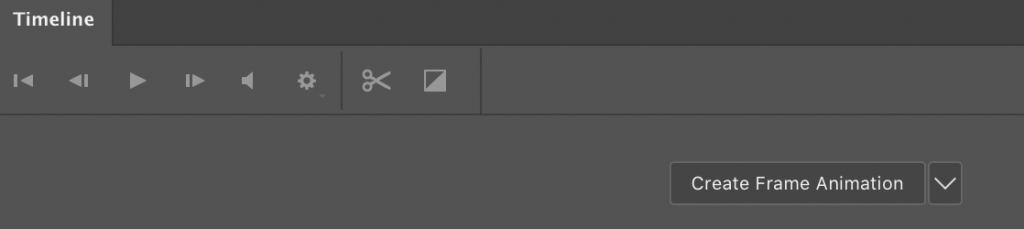
Once you have all your images uploaded go to Window > Timeline at the top of the Photoshop screen. This timeline is where the animation will be created. Click the create frame animation option once it appears.
Now you need to consider the speed of your animation. If you make each frame too quick the information will speed by too fast. If it is set too slow, viewers may lose interest. A drop down menu on each frame allows you to adjust the length of time it is shown.
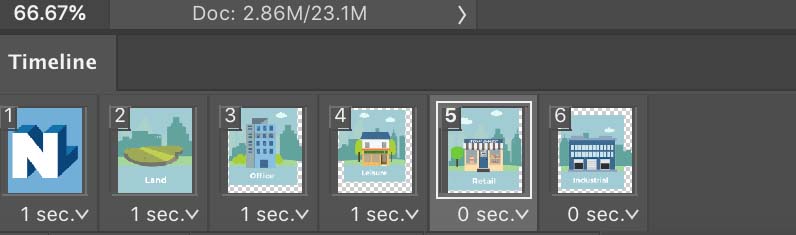
And then under the frames view is an option to set how many times you want the animation to loop, or cycle through the frames. I set mine to forever. Click the play button and test your creation!
Once you are happy with the settings it’s time to export as a GIF. Go to File>Export>Save for Web (Legacy). An export screen will open with numerous options. I left all of mine as default and clicked save to export the GIF to my chosen location (which usually is the desktop until I move it elsewhere!)
Adding a GIF to an email.
First of all a couple of things to note. GIF’s are supported by most email providers. However despite a recent update Outlook has not added support for Outlook 2007-2019. It does support Office365. If you make sure you have a great looking first image, even if someone can only see a static picture it’s still going to look good.
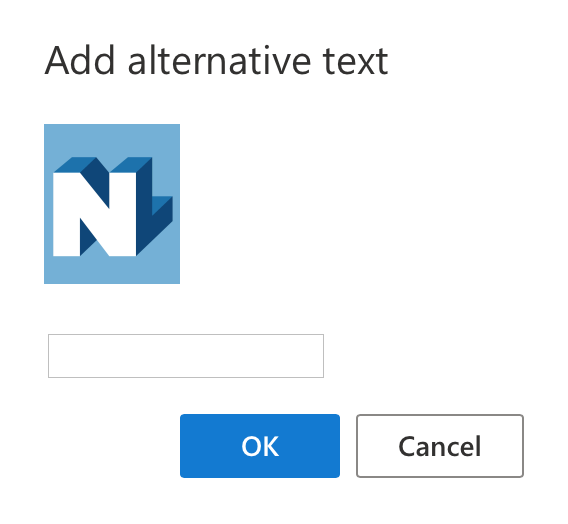
Adding a GIF to an email is as simple as inserting a normal static image. I did scale the size down once I’d added mine. Something to bear in mind is that as with any image you should add alt text to assist the visually impaired. Simply right click your GIF and select add alternative text.
All of the above instructions apply if you wish to add a GIF to your email signature or to a word document for mail merges. Happy GIF creation and sending!!